Rainbow Cookies

Its a gloomy winter day, why not chase those winter blues away with rainbow cookies! I originally made these cookies because a friend of mine said she loves rainbow cookies and it was her birthday. Plus I wanted to know what the fuss what about with these rainbow cookies and it looks colorful. Ever since then I have tried a few rainbow cookies from different bakeries and I feel that either they make it too sweet for my taste, too much food coloring (looking like radioactive neon) or very oily. The ones I make are none of those things because well…I followed a different recipe, put less sugar and less food coloring.

Rainbow Cookies
Adapted from Epicurious
There is nothing to this recipe, its quite simple but time consuming. It is all worth it in the end because it tastes really good and so addicting. Ask my family, they eat one and another one then before you know it almost half is gone…it’s that good. Although for those of you who are allergic to nuts, I advise you not to eat it because this contains almond paste (or marzipan).
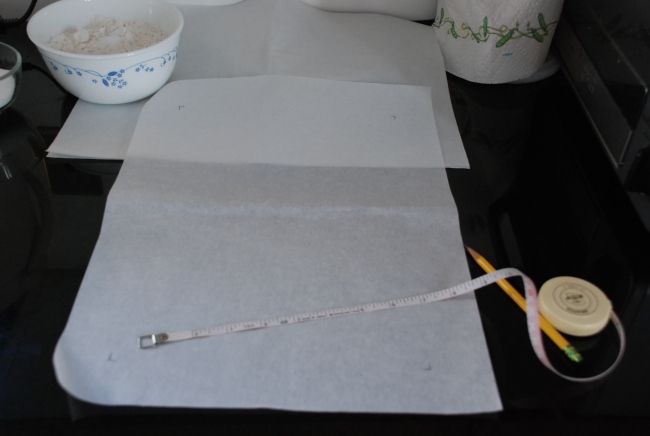
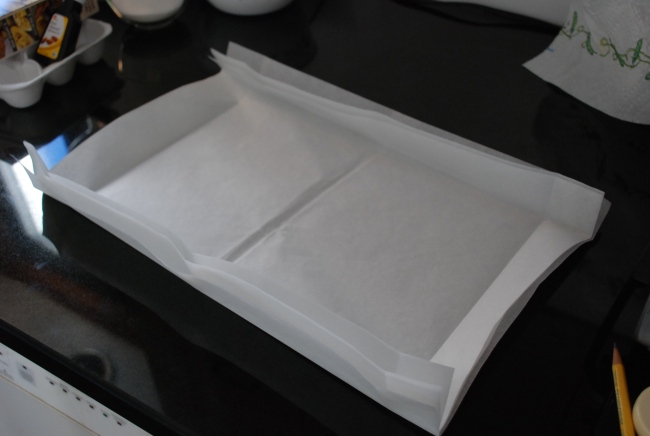
If you don’t have 13 by 9 inch metal baking pans, measure out the dimensions on the parchment paper. That’s what I did or else you are going to have some lopsided rainbow cookies.
As I mentioned before about the oiliness of some cookies these don’t even though you do use quite a lot (3 sticks!) but don’t let that deter you from making it. I might try this again with some substitute for the butter.
If you don’t have raspberry jam, its ok just use whatever jam you have available and don’t skimp on it because that is the glue which holds the layers of “rainbows” together.
Also, for the chocolate melting part. I took a short cut and melted it in the microwave because I’m lazy to use a double boiler.
Image
All the ingredients, minus the parchment paper.
Image
Measuring out the dimensions for the cookies.
Image
finished with the measurements.
Image
the melted butter (from the microwave) and grounded sugar and almond paste. I use a coffee grinder to turn the paste and sugar into a fine mixture.
Image
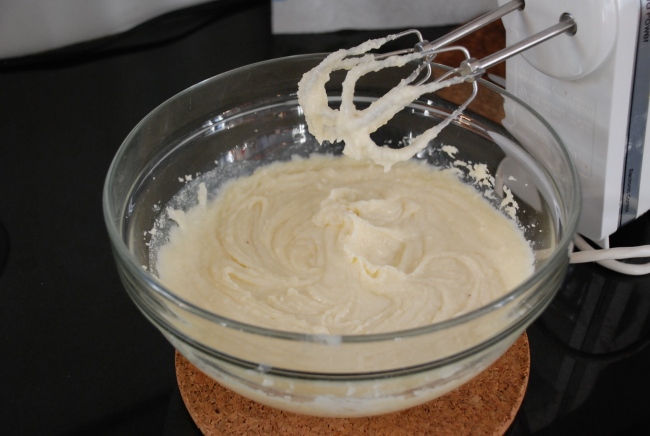
Mixed butter and almond paste/sugar.
Image
Previous mixture along with the rest of the ingredients. At this point it smells really good because the almond extract brings out the almond flavor.
Image
Letting a layer cool off. There is a bit of a mishap because I tried to invert the layer and in the process I broke the corner.
Image
The rest of the rainbow.
Image
the mishap up-close, I covered it up with jam and another layer will go on top of it. phew!
Image
Final product! the chocolate could been done smoother and nicely but the chocolate wasn’t tempered properly….It’s all good though because it still tasted amazing!

7 ounces marzipan paste or almond paste
1/2 cup sugar
3 sticks unsalted butter, softened
4 large eggs, separated
1 teaspoon almond extract
2 cups sifted all-purpose flour (sift before measuring)
1/4 teaspoon salt
5 drops green food coloring, or to desired color
5 drops red food coloring, or to desired color
12-oz jar raspberry jam
6 ounces semisweet chocolate chips

Preheat oven to 350°F and grease 3 (13- by 9-inch) metal baking pans. Line bottom of each with wax paper, letting it extend at 2 opposite ends, and grease paper. Break marzipan paste into small pieces and grind with sugar in food processor until no lumps remain. Transfer to a large bowl and add butter. Beat with an electric mixer until light and fluffy, then add yolks and almond extract and beat well. Beat in flour and salt on low speed. Beat egg whites in another bowl with cleaned beaters until they just hold stiff peaks and stir one third into batter to lighten slightly (batter will still be stiff). Fold in remaining whites thoroughly. Divide dough into thirds (about 1 1/2 cups each). Stir green food coloring into one third and red food coloring into another, leaving one third plain. Spread each dough separately into a pan. (Layers will be thin.)

Bake layers in batches in middle of oven until just set and beginning to turn golden along edges, 7 to 10 minutes total. Run a knife along edges to loosen from pan, then while still hot, invert a large rack over pan and invert layer onto rack, pulling gently on wax paper overhangs to release if necessary. Peel off wax paper and cool completely.

Line a large shallow baking pan with wax paper and slide green layer into it. Spread half of jam evenly over green layer and carefully top with plain layer. Spread remaining jam evenly over uncolored layer and carefully top with pink layer (trim edges if necessary). Cover with plastic wrap and weight with a large cutting board or baking pan. Chill at least 3 hours.

Melt chocolate in a double boiler or a metal bowl set over a pan of barely simmering water. Remove weight and plastic wrap and spread chocolate evenly over top, but not sides, of pink layer. Let stand at room temperature until set, about 1 hour, and cut into small diamonds (12 rows crosswise and 12 diagonal rows) or into squares.

Happy Thanksgiving!

Yes, I know. it’s about time that I wrote another post. I’ve been just plain lazy and busy with work and life. So just in time for thanksgiving I am baking a good ole’ apple pie. I had an apple pie party with a friend and we planed to bake three pies but instead made four with the extra dough left over and more than enough apples. I overestimated the amount of apples needed but its ok since I boiled down the apple and the juices then turned it into an apple sauce.
Also, Have a wonderful thanksgiving with all of your family and friends!
Image
get all those ingredients together.
ImagePea sized butter
Image
Image
That’s a lot of dough (no pun intended)
Apple Pie Crust
Adapted from Mark Bittman
The recipe in the link will only make one pie crust and this one will make two, one for the bottom and another for the top.
After making this pie crust many, many times I noticed that the amount of water needed was much more than recommended. Sometimes, ok most of the time, I would add a tad bit too much water, making the dough very sticky and watery, but not to worry I would add more flour till it wasn’t sticking to the sides of the bowl.
I wrote next to the butter to cut it into pea sized pieces only because I don’t have a big fancy food processor, just a small one which can’t fit it all in, I use a knife to cut the butter into smaller pieces and then mix it together with the flour with my hands.
2 1/4 cups all-purpose flour, plus more for rolling
1 teaspoon salt
2 teaspoon sugar
16 tablespoons (2 stick) cold unsalted butter, cut into pea sized pieces
13 tablespoons ice water, plus more if necessary

Combine the flour, salt, and sugar in a food processor and pulse once or twice. Add the butter and turn on the machine; process until the butter and flour are blended and the mixture looks like cornmeal, about 10 seconds.

Put the mixture in a bowl and add the ice water; mix with your hands until you can form the dough into a ball, adding another tablespoon or two of ice water if necessary (if you overdo it and the mixture becomes sodden, add a little more flour). Form into a ball, wrap in plastic, and freeze for 10 minutes or refrigerate for at least 30 minutes. (You can refrigerate the dough for up to a couple of days or freeze, tightly wrapped, for up to a couple of weeks.)

Sprinkle a clean counter-top with flour, put the dough on it, and sprinkle the top with flour. Use a rolling pin to roll with light pressure from the center out. If the dough is hard, let it rest for a few minutes. If the dough is sticky, add a little flour (if it continues to become sticky, and it’s taking you more than a few minutes to roll it out, refrigerate or freeze again). Roll, adding flour and rotating and turning the dough as needed; use ragged edges of dough to repair any tears, adding a drop of water while you press the patch into place.

When the diameter of the dough is about 2 inches greater than that of your pie plate, drape the dough over the rolling pin to transfer it into the pie plate. Press the dough firmly into the plate all over. Refrigerate for about an hour before filling (if you’re in a hurry, freeze for a half hour or so).

Trim the excess dough to about 1/2 inch all around, then tuck it under itself around the edge of the plate. Decorate the edges with a fork or your fingers. Freeze the dough for 10 minutes (or refrigerate it for 30 minutes).

When you’re ready to bake, either fill it or prick it all over with a fork for prebaking.
Image
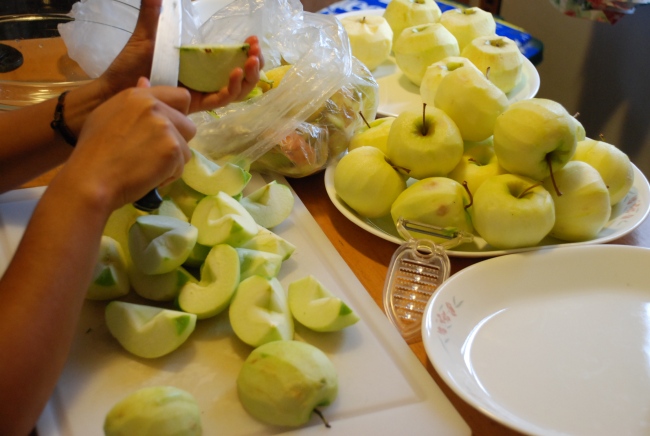
Apples for days
Image
Granny smith apples with sugar and spice.
Image
Granny smith, Golden delicious and Fuji apples.
Image
Roll that dough out!
Image
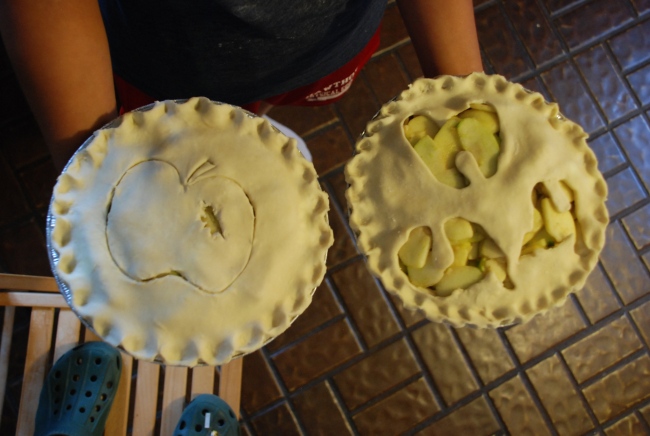
pie designs (apple and a cat). don’t mind the feet and other bodies.
Image
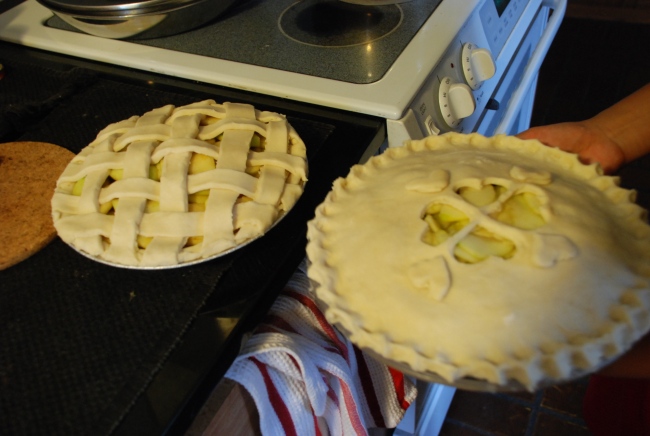
Lattice and heart design.
Apple Pie Filling
Adapted from America’s Test Kitchen Cookbook
I have a jumble of apples that I use since I usually go to Asian supermarkets and they don’t have the same variety as American supermarkets. I pick a few that are sweet and sour.
I put corn starch and flour since I get paranoid that the apple pie will get all soggy from the excess juice but then I learned, the hard way, to NOT put all the excess juice that accumulates when you first mix it together with the spices and sugar. Maybe its because I leave the mixture out too long and the lemon juice, sugar and apple get a chance to mingle then all the juice appears.
What happens to that lovely sugar and spice juice? well I’m glad you asked, instead of using an egg white to get the crust to brown I use the excess juice to get that lovely shine and color.

3 Fuji apples
2 Golden delicious apples
2 Granny smith apples
1 tablespoon juice and 1 teaspoon zest from 1 lemon
2/4 cups, plus 1 tablespoon sugar
1 tablespoon corn starch
1 tablespoon all-purpose flour
1/4 teaspoon salt
1 teaspoon cinnamon
1/4 teaspoon ground nutmeg
1/4 teaspoon ground allspice
1 egg white, beaten lightly

Adjust oven rack to the middle and oven to 425°F. Remove one piece of dough from refrigerator (if refrigerated longer than 1 hour, let stand at room temperature until malleable).

Roll dough on lightly floured work surface or between two large sheets of plastic wrap to 12-inch disk. Transfer dough to pie plate by rolling dough around rolling pin and unrolling over 9 1/2-inch pie plate or by folding dough in quarters, then placing dough point in center of pie plate and unfolding. Working around circumference of pie plate, ease dough into pan corners by gently lifting dough edges with one hand while pressing around pan bottom with other hand. Leave dough that overhangs lip of plate in place; refrigerate dough-lined pie plate.

Peel, core and cut apples in half, and in half again width-wise; cut quarters into 1/4-inch slices and toss with lemon juice and zest. In a medium bowl, mix 2/4 cup sugar, flour, salt and spices. Toss dry ingredients with apples. Turn fruit mixture, with some of the juice, into chilled pie shell and mound slightly in center.

Roll out second piece of dough to 12-inch disk and place over filling. Trim top and bottom edges to 1/2-inch beyond pan lip. Tuck this rim of dough underneath itself so that folded edge is flush with pan lip. Flute edging or press with fork tines to seal. Cut four slits on dough top. If pie dough is very soft, place in freezer for 10 minutes. Brush egg white onto top of crust and sprinkle evenly with remaining 1 tablespoon sugar.

Place pie on baking sheet and bring the temperature to 425°F. Bake until top crust is golden, about 25 minutes. Rotate pie and reduce oven temperature to 375°F; continue baking until juices bubble and crust is deep golden brown, 30-35 minutes longer.

Transfer pie to wire rack; cool to room temperature, at least 4 hours

Image
four pies all baked. lovely!
Image
my apple pie baking partner, spying on the pies!
Image
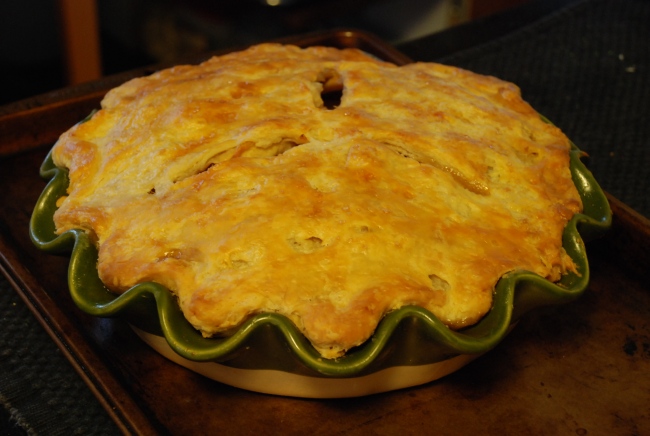
An extra pie from another day that I couldn’t resist showing. I bought a fancy new ceramic pie plate from Williams-Sonoma with a gift card from my lovely aunt, thanks!

Banana bread cake pops

Once again the last few bananas in my house have been neglected. Fortunately for me I had the good sense to prolong its brown yellow life in the fridge and bake banana bread cake pops. These were inspired by my friend Nicole who told me this long ago when I made the carrot cake pops.

Banana Bread Cake Pops
Recipe for Banana Bread
When I made the banana bread this time I left out the butter because as I mentioned in the previous post the banana and yogurt makes up for the lack of butter.
Put 1/2 cup of chocolate instead of 3/4 cups since the coating of the cake pop would be chocolate.
Substituted 1/2 cup of flour for 1/2 cup of ground flaxseed.
You can feel less guilty eating this cake pop or bread.
DSC_3887
Crumbly banana chocolaty goodness.
DSC_3889
Cake pops all made.
DSC_3894
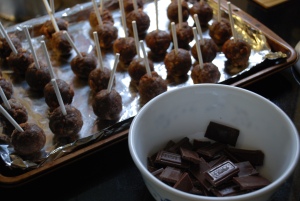
Cake pops ready for chocolate covering. I had were a few pieces of Hershey bar chocolate in the kitchen.
DSC_3897
Time for the chocolate.
DSC_3903
All done and ready to eat!

Cake pop assembly
After letting it cool for a while, crumble the banana bread in a bowl with your hands or fork or both.
The banana bread has already a binding component from the mushy bananas, when you get to this point you will see, so you don’t need add any type of frosting or binding agent.
Make the cake pops into the size of a ping pong ball or a tad smaller and place the lollipop sticks inside the cake balls. (I advise you to cut the lollipop sticks in half since I think they are too long)
Place the cake pops on a baking tray, lined with aluminum foil or parchment paper, and put them in the freezer for 15 mins or refrigerator for 30 mins or less since the cake pops have the mushy banana binding.
Melt the chocolate in the a double boiler or microwave it in 20 second increments. Watch the chocolate, especially in the microwave, so you don’t dry out the chocolate.
Take the cake pops out and start to cover them in the chocolate and place them back on the baking tray.
When you are done with that, place the cake pops back in freezer or fridge to harden the chocolate. After the wait then you can eat it!

Berry Crumble

One day I watching Ina Garten on her food network show, Barefoot Contessa, she was baking a peach blueberry crumble and I thought oh my goodness, that looks so delicious! I have to make it! Actually almost everything that she makes I also want to make because it looks delicious, even a simple fruit platter or antipasto. Ina Garten is by far one of my favorite cooks because she always looks happy, relaxed and easy going, then again who wouldn’t when you live in the Hamptons. Plus, she has all these fabulous friends that come over and help her cook or decorate. awesome! Speaking of fabulous friends, I have a friend (J.Z.) that also loves Ina Garten as much as I do. My friend has a few of her cookbooks, sadly I only have one but that one has her signature in it!
I realized that I haven’t really talked about music in a while, the songs I am listening to now are by Lana del Rey. Her music has a more low and slow, sometimes a sadder, tone to her tunes but I guess her music grew on me and I like it. Some of her more popular songs are blue jeans, blue velvet (this song was played in an H&M commercial with her in it) and young & beautiful (this song was on The Great Gatsby soundtrack and trailer). Now on to the food!

Berry Crumble
Adapted from Ina Garten
Instead of using peaches I used frozen raspberry and strawberry along with the blueberries, just because I didn’t have peaches. Also I found that the recipe asked for a lot more flour than I thought it needed or it could be because I didn’t have enough fruit. It’s a bit of both, to remedy that I would add on two more cups of any berry of your choice and lowering the amount of flour (which is done below).
If there is anyone out there that is following a gluten-free diet then instead of using flour you can use cornstarch and you don’t have to make the crumble, this is great over other things such as gluten free ice cream or banana bread…..Hi Amy!
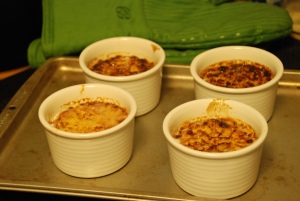
In the original recipe the dessert was plated in ramekins but if you don’t have those you can put it in a baking dish or casserole dish.
DSC_3692
Colorful ingredients.
DSC_3696
Berries combined with the flour mixture.
DSC_3709
The crumble and fruit mixture.
DSC_3712
Ready for the oven.
DSC_3716
DSC_3724
Top it off with some ice cream and its ready to eat!

For the fruit:
2 teaspoons grated lemon zest
2 tablespoons freshly squeezed lemon juice
1/2 cup granulated sugar
2 tablespoons all-purpose flour
2 cup raspberry
1 cup strawberry
2 cup fresh blueberries (1/2 pint)
For the crumble:
1 cup all-purpose flour
1/4 cup light brown sugar, lightly packed
1/2 teaspoon kosher salt
1/4 teaspoon ground cinnamon
1/4 pound (1 stick) cold unsalted butter, diced
Preheat the oven to 350 degrees F. Add the lemon zest, lemon juice, granulated sugar, and flour in a large bowl. Toss well. Gently mix in the blueberries, strawberry, raspberry. Allow the mixture to sit for 5 minutes. Spoon the mixture into ramekins or baking dish.For the topping, combine the flour, brown sugar, salt, cinnamon, and the butter in the bowl of an electric mixer fitted with a paddle attachment. Mix on low speed until the butter is the size of peas, or if you are like me then use a knife to cut the butter into itty bitty bits. Rub the mixture with your fingertips until it’s in big crumbles, then sprinkle evenly over the fruit. Place the ramekins on a sheet pan lined with parchment paper and bake for 40 to 45 minutes, until the tops are browned and crisp and the juices are bubbly. Serve warm or at room temperature.

If you want to make these early, store the unbaked crumbles in the refrigerator and bake before dinner.

Crème brûlée

I hope you all had a wonderful Fourth of July with tons of fireworks, I know I did! It’s so beautiful to look at but it makes the loudest noise and creates such a scare with it goes off, nevertheless its still fun to play with fireworks!
This fancy named dish was made because I really wanted to make something special for my family since we went through a lot sweat and work to put on a large event. Plus, I had half and half just sitting in my refrigerator.

Crème brûlée
adapted from Williams-Sonoma
I found this recipe in a dessert cookbook from Williams-Sonoma. I haven’t made this in a while, so I totally forgot if I did something wrong or it was the recipes fault because It was not right when I first made it, the custard/crème was still very jiggly when it came out of the oven. Does not mean you cannot eat it, the dessert will be more like a creme caramel. I admit it might be my fault since the recipe tells you to pour the mixture through a sieve and for some reason I forgot about it and maybe half and half is not the right dairy to use. This recipe will have to be revisited another time.
Ah ha! I do remember that I definitely need to lower the sugar amount (the recipe below has the changed amount) cause I think this might give someone a head start into diabetes and never to use brown sugar for the sugary tops to be brûléed because it will be turned into a blackened mess and you will be sad…I know I was.
DSC_3552
DSC_3569
Getting the ramekins ready in a roasting pan.
DSC_3577
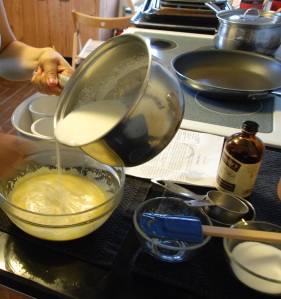
Pour the hot cream into the egg mixture.
DSC_3603
Evenly pour the custard in each ramekin.
DSC_3626
I used a broiler to burn the sugar since I couldn’t find the torch.

2 cups heavy cream

6 large egg yolks

1/4 plus 4 tablespoon sugar

1/2 teaspoon vanilla extract

Preheat an oven to 300°F. Have a pot of boiling water ready and a large baking pan

In a 2-quart saucepan add the cream, stir to mix and set the pan over medium-low heat. Warm the cream until bubbles form around the edges of the pan and steam begins to rise from the surface. Remove from the heat and set aside for about 15 minutes.

In a large bowl, whisk together the egg yolks and the 1/4 cup sugar until smooth, blended and mixture is pale yellow. Gradually add the cream to the egg mixture, whisking constantly until blended. Stir in the vanilla extract. Pour the custard through a fine-mesh sieve set over a bowl. Divide the custard among four 5- or 6-oz. ramekins and place the ramekins in the prepared baking pan. Add boiling water to fill the pan halfway up the sides of the ramekins. Cover the pan loosely with aluminum foil and bake until the custard is just set around the edges, 35 to 40 minutes.

Transfer the ramekins to a wire rack and let cool to room temperature. Cover with plastic wrap and refrigerate for at least 4 hours or up to 3 days.

Just before serving, sprinkle 1 Tbs. of the sugar evenly over each custard. Using a kitchen torch or the broiler melt the sugar evenly and golden brown. If you are using the broiler, place the ramekins on a baking sheet and place 2-3 inches from the heat source, watch constantly and rotate baking sheet to brown evenly.
Serve immediately.

Happy Birthday Mom! Banana bread with chocolate.

Wishing my mother a Happy Birthday and Hello July!
Poor bananas. In my house they either get eaten quickly or slowly, or I forget them in the brown bag because I am waiting for them to ripen (It really works, just put an apple inside too). This time it was because the bananas were being eaten slowly, so slow that I had to put them in the refrigerator, but lovely for me to make banana bread!

Banana bread with chocolate
Adapted from Molly Wizenberg
This recipe came from her book A Homemade Life, which has quite a few recipes with a great story behind each one.
The butter and flour can be substituted for a healthier option. The banana and yogurt in the recipe can substitute the butter. Bananas can substitute the full amount of butter or, if you are skeptical, half the amount and the yogurt can substitute half the amount.
As for the flour, get yourself some ground flax seed and substitute about half or quarter the amount. This substitution can be put into use with just about any recipe. Another nifty tip, when you don’t have any baking soda just use double the amount of baking powder.
DSC_3502
getting ready to bake!
DSC_3509
mushy bananas, not a very appealing color.
DSC_3512
Pouring the mushy banana mixture into the dry ingredients. again not the most appealing color or action for that matter..oops.
DSC_3517
poured out the batter into the greased loaf pan and smoothed the top of the batter as best I could.
DSC_3520
Then out of the oven and the loaf has turned a beautiful golden brown. It smelled delicious! I had to restrain myself from eating it because I had to save it for a family gather the next day.

6 Tablespoons unsalted butter (optional because of the bananas)
2 cups all purpose flour (or 1 1/2 cup flour & 1/2 ground flax seed)
2/4 cup sugar
3/4 teaspoon baking soda
1/2 teaspoon salt
3/4 cup chocolate chips
2 eggs
3 large ripe bananas (about 1 1/2 cups mashed bananas)
1/4 cups of  whole milk plain yogurt or greek non fat yogurt
1 teaspoon vanilla extract

Set a rack in the center of the oven, and preheat to 350F. Grease a 9 by 5 loaf pan with cooking spray or butter.

In a small bowl, microwave the butter until just melted. (Be careful and do this over medium power in short burst because it can explode or splatter and that is a big mess.) Or melt it in the preheating oven. Set aside to cool slightly.

In a large bowl, whisk together the flour, sugar, baking soda, and salt. Add the chocolate chips and whisk well to combine. Set aside.

In a medium bowl, lightly beat the eggs with a fork. Add the mashed banana, yogurt, melted butter, and vanilla and stir to mix well. Pour the banana mixture into the dry ingredients, and stir gently with a rubber spatula, scraping down the sides as needed, until just combined. Do not over mix. The batter with be thick and somewhat lumpy, just make sure all the flour has been incorporated. Scrape the batter into the loaf pan and smooth the top.

Bake until the loaf is a deep shade of golden brown and a toothpick inserted into the center comes out clean, 50 mins to an hour. If the loaf seems to be browning too quickly, tent with foil.

Cool the loaf in the pan on a wire rack for 5 mins. Then tip out onto the rack, and let it cool completely before slicing (if you can wait that long).

The loaf freezes well wrapped in plastic wrap and again in foil to protect from freezer burn.

Carrot cake pops

These were baked as a request from one of my best friends, she said that she had never seen anyone make carrot cake pops. So I made it with my god sister, it was really fun to make. I think if anyone has a party or kids, they will love this cause kids get to wreck the cake and its a bite size piece of cake that you don’t have to feel super guilty about.

DSC_3372
DSC_3382
DSC_3387
DSC_3389
butter up and flour the baking pan.
DSC_3401 DSC_3402
DSC_3409
DSC_3418
DSC_3424
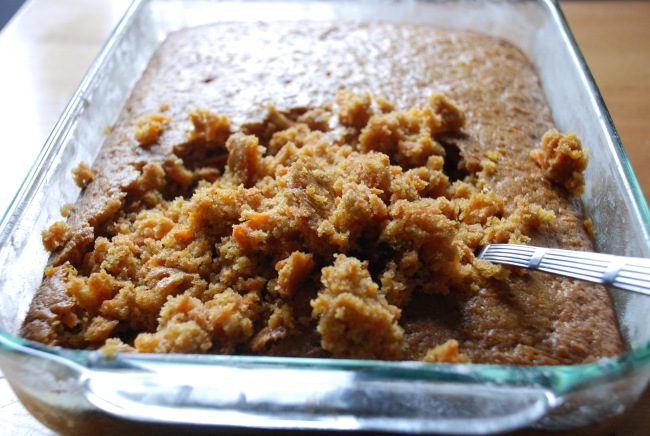
mixing the cake to crumbly blob
DSC_3426
DSC_3434
DSC_3436

Carrot cake pops
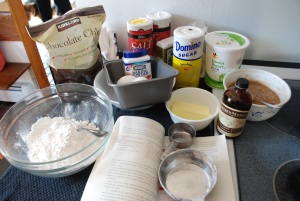
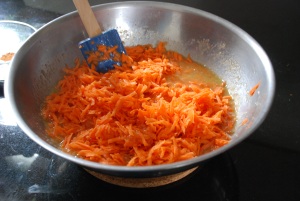
I used a recipe from my previous post Carrot cake.
The great things about this recipe is it can be easily adapted to any type of cake.
The icing will have to be doubled in amount, although the powdered sugar could be cut down since you will have to use more of it in this recipe.
Once you have the ingredients for the carrot cake then all you need is the lollipop/cake pop sticks. I would suggest to cut the sticks in half.

Cake pop assembly
After you have baked the cake and let it cool. Then use a fork to mix the cake till its all crumbled.
Add the first portion of icing to the crumbled cake, this is done to help the cake adhere to each other.
Mix the icing and cake together, it will look crumbled blobs.
Use your hands to shape the cake into a ball, roughly the size of a ping pong ball and place them on a cookie sheet or container.
Place sticks in the middle of cake balls and then put them into the freezer for 15 mins or refrigerator for 30 mins for the cake to firm up and form.
Make the icing while you wait for the cake pops to harden. You want the icing to be more liquidy than the previous icing made, therefore adding less powdered sugar or heating the icing up before usage would allow that to happen.
Take out the cake pops from the fridge and dip them in the icing then place them back on the cookie sheet. Once done with icing put them back into the fridge to harden the icing.
Voila, you have cake pops!

Puff pastry

This baking done was out of  hunger and procrastination (I am very good at that). I had store bought puff pastry in my freezer because I attempted to make napoleons (mille-feuille) once, that was an arduous task, and if I ever made it again I would use it. But instead of making napoleons I made an Asparagus and dill quiche and apple galette since the package came with two puff pastry sheets. When I unfolded the puff pastries I felt that it was not big enough to use, therefore I rolled it out a bit.
As I was baking I listened to Michael Bublé’s new album, To be loved,  to calm my brain down from all the studying. It’s a great album and I love his music.

Asparagus and dill quiche.
Adapted from not derby pie
In the original recipe, a rectangular tart pan is used but I have a circular one and I felt that it’s not much of a tart but more of a quiche since it has cheese, milk and eggs.
Also, I did not have buttermilk so I decided to make my own, which is the yellow/white mixture in the bowl.  That was not a good idea, I knew it too but I still had to try it, because after you bake it all those lumpy bits, which you see in one photo, melts into a big puddle of butter atop the quiche. I had to use coffee filters to soak up all that butter. Well I learned my lesson, buy buttermilk or use the milk you have already.
Another store bought product, as you can tell, is frozen asparagus. No need to boil it just defrost it and use it.
DSC_3352
The weird buttermilk mixture I attempted to make.
DSC_3354

DSC_3356
the lumpy butter bits.
DSC_3366
After I soaked out all the butter.

1 bunch of asparagus (about 12 spears)
1 1/4 cups milk
2 eggs
4 or 5 bunches of dill (more if desired), chopped
3 tablespoons grated parmesan cheese

Roll the dough into an 11-inch disk (for a 9-inch round pan) or a 16″ x 6″ rectangle (for a rectangular pan) and fit it carefully into the pan, leaving the overhang in place for now. Prick the dough with a fork, then stick in the fridge for half an hour or so to rest (this ensures that the dough won’t shrink when baked. The overhang helps with this, too; I cut it off after the tart was done.) Meanwhile, preheat the oven to  400°F. Put crust on a flat baking sheet and blind bake the crust for 15 minutes, then reduce the oven temperature to 350°F. Leave the tart on the baking sheet.

Bring a large pot of water to a boil, then drop in asparagus and cook just until tender, about 5 minutes. (Slater says longer, but I can’t bare to overcook a batch of perfect ‘gus.) Remove the asparagus and set aside.

Combine eggs and milk in a medium bowl and whisk to combine. Add the tarragon to the cream mixture along with a pinch or two of salt and pepper.

Lay the asparagus in the tart crust. (Slater recommends you cut them into shorter lengths, but I think the full spears look elegant in the finished tart.) Pour the cream mixture over the asparagus, taking care to fill in the tart evenly. Transfer the tart, on its baking sheet, into the oven and bake for 40 minutes, until the filling is golden and quivers only slightly when moved. Serve warm.

Apple galette.
adapted from Williams-Sonoma
I was going to try to make this out of memory from the apple pies I’ve made but I thought I better refer to a recipe just to make sure.
I did not want to save the puff pastry for another time, besides I had extra apples that I cut up from the French apple tart.
DSC_3362
DSC_3367 DSC_3368

2 lb. apples, such as Granny Smith or Jonagold,
peeled, cored and cut into 1/4-inch slices
1/2 cup sugar
2 tsp. fresh lemon juice
1 tsp. ground cinnamon
1/2 tsp. all spice
1/4 tsp. salt
1 1/2 Tbs. cornstarch

To make the filling, in a large bowl, stir together the apples, sugar, lemon juice, cinnamon, nutmeg, salt and cornstarch. Set aside.

Roll the puff pastry to a bit to accommodate the amount of apples you will be putting in. About 12-inch round. Brush off the excess flour. Transfer the dough to the prepared baking sheet, cover with plastic wrap and refrigerate for 30 minutes.

Arrange the apple filling in the center of the dough, mounding the fruit slightly and leaving a 2-inch border. Gently fold the edges of the dough over the apples, pleating loosely. Lightly sprinkle sugar over the apples.

Bake until the crust is golden and the apples are tender, about 1 hour. Transfer the pan to a wire rack and let the galette cool completely, about 1 hour.

Enjoy!

French apple tart

A Happy belated Mother’s Day!! I hope everyone celebrated with their loved ones.
Now I did not forget my blog I have just been busy studying and studying for yucky tests and sadly I still have more. But today, and yesterday, I am taking a break. So on with the baking! This French apple tart is a dainty simple dessert that I saw Ina Garten make on tv and my oh my did it look delicious!

French Apple Tart
Adapted from Ina Garten
Don’t have a food processor, not to worry. I use a knife and cut them into tiny pieces then add them into the flour.
I find that the water you need to add in the pastry dough is never enough. Add more water till the dough comes together and if you add too much water, put a bit more flour to make it less sticky and watery.
If you have some oddly shaped sliced apples don’t worry about it, just place it in the same pattern and if there are tiny spaces left on the pastry, just make your own shape out of the apple slices. No one will notice because they will be too busy enjoy it!
When making this I suggest you sprinkle the sugar at least one inch away from the border of the pastry because the sugar and apple juices will melt and burn the edges of the pastry. Burnt sugar tastes kind of good but its no fun trying to pry it off the baking sheet.
DSC_3325

DSC_3331

DSC_3335
Apples, apples, apples…I think I cut too many but its okay, more for me to work with.

DSC_3339

DSC_3341
Rolled out that dough.

DSC_3343
Apples laid out nicely in a type of fish scale pattern. Sprinkled with sugar and dotted with butter.

DSC_3346
Out of the oven and into my tummy.

Pastry dough

2 cups all-purpose flour

1/2 teaspoon kosher salt

1 tablespoon sugar 1

2 tablespoons (1 1/2 sticks) cold unsalted butter, diced

1/2 cup ice water

Apples

4 Granny Smith apples

1/4 cup sugar

2 tablespoons cold unsalted butter, small diced

1/2 cup apricot jelly or warm sieved apricot jam

2 tablespoons  water

For the pastry, place the flour, salt, and sugar in the bowl of a food processor fitted with the steel blade. Pulse for a few seconds to combine. Add the butter and pulse 10 to 12 times, until the butter is in small bits the size of peas. With the motor running, pour the ice water down the feed tube and pulse just until the dough starts to come together. Dump onto a floured board and knead quickly into a ball. Wrap in plastic and refrigerate for at least 1 hour.Preheat the oven to 400 degrees F. Line a sheet pan with parchment paper or aluminum foil.

Roll the dough slightly larger than 10 by 14-inches. Using a ruler and a small knife, trim the edges. Place the dough on the prepared sheet pan and refrigerate while you prepare the apples.

Peel the apples and cut them in half through the stem. Remove the stems and cores with a sharp knife and a melon baler. Slice the apples crosswise in 1/4-inch thick slices. Place overlapping slices of apples diagonally down the middle of the tart and continue making diagonal rows on both sides of the first row until the pastry is covered with apple slices.  Sprinkle with the full 1/4 cup of sugar and dot with the butter.

Bake for 45 minutes to 1 hour, until the pastry is browned and the edges of the apples start to brown. Rotate the pan once during cooking. If the pastry puffs up in one area, cut a little slit with a knife to let the air out. Don’t worry! The apple juices will burn in the pan but the tart will be fine! When the tart’s done, heat the apricot jelly together with the water and brush the apples and the pastry completely with the jelly mixture. Loosen the tart with a metal spatula so it doesn’t stick to the paper or foil. Allow to cool and serve warm or at room temperature.

Oatmeal peanut butter cup cookies

Over the weekend my god sister came to stay over my house and we decided to bake oatmeal cookies but not just any old oatmeal cookie, we put in reese’s peanut butter cups! I love peanut butter and with chocolate, it’s magical! Actually, every time we bake I am the one who bakes and she waits patiently but this time she took pictures for me. Thanks!

Image

Image
all the ingredients mixed together.

Image
Image
Ready for the oven!

Image
DSC_3302
baked and ready to eat!

Image

Oatmeal peanut butter cup cookies
The recipe was adapted from the oatmeal raisin cookies and I swapped out the raisins for the peanut butter cups. If you want you could add 1/2 cup of dried cranberries for some tartness to balance out the sweetness of the peanut butter and chocolate. I would have done that but sadly I did not have any.

3/4 cup butter, softened

1/2 cup of brown sugar

1/4 cup milk

1 egg

1 cup all-purpose flour

1 teaspoon cinnamon

1/2 teaspoon baking spoon

1/4 teaspoon salt

3 cups oatmeal

1 cup mini Reese’s peanut butter cups, cut into quarters

Heat oven to 350 degrees.
Beat butter, brown sugar, milk, egg and in a large bowl until combined.
Add flour, cinnamon, baking soda and salt into the butter mixture and mix together.
Stir in oats and peanut butter cups. Drop tablespoonfuls onto aluminum foil or wax paper covered cookie sheets.
Bake 12 to 15 mins. Remove from oven and let it cool